|
Starting Seeds IndoorsStarting seeds indoors is a great way to give your garden plants a head start in the spring and extend the growing season. There are several ways you can do this. Starting Potting Soil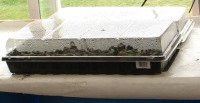
This first method of starting seeds indoors saves you a little more money but is more time consuming. Buy starting potting soil mix or make your own. To make your own potting soil, mix: 1/3 Sphagnum Peat Moss, 1/3 Perlite, and 1/3 Vermiculite. Spread this mixture in a shallow tray and plant your little seeds in a row. How deep do you plant your seeds? Here’s the basic rule of thumb: the depth to plant a seed is about 4-5 times the diameter of the seed.
After the plants are about 2 inches tall they should be transplanted into individual pots so they are not competing with the other plants. To make the growing soil, mix ¼ part each of: Peat Moss, Vermiculite, Perlite, and ground composted bark. Jiffy Plugs or a Starting Kit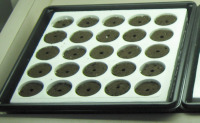
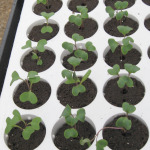
Another way of starting seeds indoors is to use individual 1” commercially prepared plugs. This is a little more expensive, but it is also more convenient. Plant one or two seeds in each plug. If both seeds germinate pull out the weaker plant. This system of starting seeds indoors does not require you to transplant the plants after they germinate.
The plugs are prepared with mycorrhizae fungal spores to help generate a symbiotic relationship between the growing plant and the soil. As a result a very healthy plant develops. When the seeds have germinated and plants begin to grow, remove the dome top. Grow LightsUntil the plants are ready to plant directly into your garden, it’s important to place the little plants under a good grow light or directly in the sunlight in a controlled-temperature growing chamber. This keeps them from reaching for the light and getting spindly. Keep the soil around the plants moist (not dry or too wet). 
If you don’t have a very good lighting system, it is better to transfer the tray of plugs outside in the direct sunlight. It is important to keep the temperature of these young growing plants at 70-80 degrees F. You can use:
Cold FrameHere’s how you make a cold frame: Start by making a rectangular box with boards or bales of straw. Cover the top of the box with windows. This creates a solar environment. Place your box in a place where it will get full sun exposure. In really cold conditions the temperature may drop below the ideal temperature for optimal growing conditions. On cold nights the glass can be covered with blankets. You need to pay close attention when using this system to prevent temperatures from getting too cold at night and too hot during the daytime. Miniature Temperature Controlled Greenhouse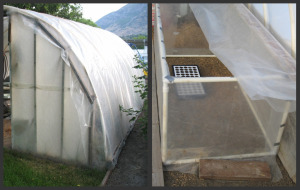
The picture illustrates what a greenhouse inside a greenhouse can look like. Put the smaller greenhouse chamber inside the larger greenhouse. You can build a frame out of wood or PVC pipe and cover it with heavy duty clear plastic. Put your young growing plants in the chamber. A small thermostatic controlled heating unit with a blower motor on it is placed in the chamber to keep the temperature at 70-80 degrees. When the outside temperatures start to warm up, you may need to take off the top covering so the plants do not get too hot. It is very cost effective because you are only heating a very small area. Transplanting Seedlings into the Garden
When you transplant the young vigorously growing seedlings outside into the garden, keep them well watered. Other plants such as,
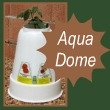
An Aqua Dome® can extend your growing season up to 120 days. You can also use a wall of water to help protect these cold sensitive plants. A five gallon bucket can be used to stabilize the wall of water. Cut the bottom of the bucket out before turning it up-side-down. Put the wall of water around the bucket. Using these systems of starting seeds indoors give your plants a good start. Plus you get to eat out of the garden a couple months earlier. Return To:Gardening Vegetables from Starting Seeds Indoors |


