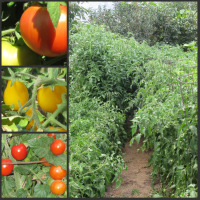
Growing tomatoes is relatively easy. Tomatoes are probably the most popular vegetable grown, and a small piece of ground can produce a lot of tomatoes.
Preparing the Soil
Growing Tomato Seedlings
Planting Tomatoes in the Garden
When to Plant Tomatoes
Harvesting Tomatoes
The first step in learning how to grow tomatoes is preparing your soil. The preparation of the soil for tomato plants is just as important as any other vegetable
Refer to types of soil.
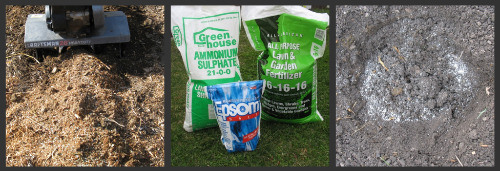
The following directions are for a row of tomatoes that’s 25 feet long. Make adjustments to fit the size of your tomato garden.
- In the early spring, decide where to plant your tomatoes. You’ll want to rotate your plants so that they aren’t in the same spot they were last year. Rotating your crop reduces the chance of disease and insect problems.
- Apply a large wheelbarrow of well-rotted manure or other organic matter to your row.
- Hand-sprinkle one quart of (8-16-10). This mixture is 8 parts nitrogen, 16 parts phosphate, and 10 parts potash. In comparison to other vegetables, tomatoes need more phosphorus than nitrogen.
- Add 1½ to 2 quarts of elemental sulfur to help acidify the soil. (Eastern soils are usually more acidic than western USA soils and don’t need the elemental sulfur.)
- This mixture of organic matter, commercial fertilizer, and sulfur is rototilled into the soil to a depth of 6 inches.
- Rake the soil back toward the center so that you have a flat planting area about 1½ feet wide.
- When you dig the holes for the tomato seedlings, sprinkle about a Tablespoon of Epsom Salt in each hole. Epsom salt is magnesium sulfate and tomatoes love this added nutrient.
Back to top
You can buy your tomato plants or grow them yourself. It is an enjoyable experience growing tomatoes from a seed.
- Approximately 6-8 weeks before the first frost-free date, you can begin to plant your seeds inside your house or in a greenhouse.
- Use the black plastic trays that are about 2 inches deep.
- Plant your row of seed in good potting soil.
- You can use Jiffy starter plugs as an alternative to using potting soil. These are convenient to use. By doing this, you avoid the need to transplant the little seedlings into larger pots. Gurney has a seed starter kit that has a water chamber underneath the starter plugs. This keeps the right amount of water going to the plants.
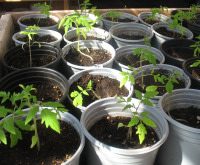
- Plant the seeds about 3-4 times the depth of the seed. (Use about 1½ times the seeds for the amount of plants you want to grow. Not all the seeds will germinate.)
- Keep the soil damp so the seeds don’t dry out. Note: You can put the clear plastic cover on the black tray until the seeds germinate. It will take about 10 days for the seeds to sprout and begin to grow. Then remove the plastic cover.
- After the seedlings are about 2 inches tall, each plant can be transplanted into another pot so it can grow without competition from the other plants. This transplanting helps the tomato plant develop a better root system. (Skip this step when growing tomatoes using Jeffy Starter Plugs.)
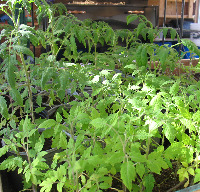
- As you water these new transplanted tomato seedlings, add some soluble mycorrhizae spores to the water. These spores have a symbiotic relationship with the roots that will help the plant grow better.
- It is important to have good light so the seedlings don’t become spindly. Expose the young growing tomatoes to full sunlight as soon as you can so they’ll become a strong well-developed plant. You can set your tomato plants outside on warm days to get them used to being outside. This helps to toughen them up so they’re ready to be planted in your garden. Bring them inside each night.
For complete details see
starting seeds indoors.
Back to Top

Do not plant your tomatoes until after the last frost. Frost will kill your growing tomatoes. See
Vegetable Planting Guide.
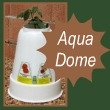
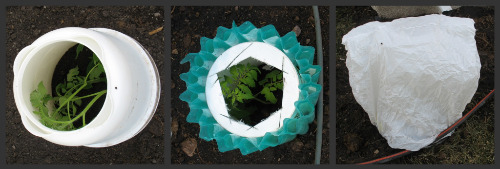
You can use an Aqua Dome® or wall of water to protect your tomato plants from a light frost. This will allow you to plant your tomatoes earlier in the season.
 In a zone 4 growing climate, the frost-free date is the last day of May. With the
Aqua Dome®,
I can plant my tomatoes at the beginning of April.
When you have a short growing season, a couple of months can make a big difference.
The wall of water is cheaper but it's pretty flimsy and tips over easily. You can take an old 5 gallon bucket and cut a hole in the bottom of the bucket. Turn the bucket up-side-down and put it over the tomato plant. Put the wall of water around the bucket. This helps to stabilize it.
If there's a storm coming in or the weather gets real cold, you can cover your Aqua Domes® with a large plastic bag. This helps to keep the heat in, but don't leave the bag on all the time. The plant does better getting air and sunlight.
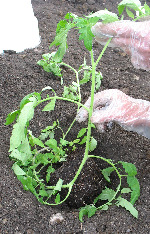
- The tomatoes will grow roots on the lower part of the stem if you cover them with dirt. The roots can go straight down or angle off to the side. It doesn't matter.
Cover 2-12 inches of the stem with dirt. Even the bottom leaves can be covered with dirt. This will help the tomato plants develop a stronger root system.
A friend told me that when she accidentally broke off the tomato's stem, she just buried several inches of the stem, and the tomato plant continued to grow.
There are several systems that are used when planting tomatoes. Here are the two I recommend:
- Black Plastic: Place black plastic over the row that you have prepared. This prevents weeds from growing if you have a weed problem. It also aids in keeping the soil from drying out and conserves water.
Plant the tomatoes every 20 inches along the row and let them spread out over the plastic. With this system, good tomatoes develop without much splitting.
It has a major disadvantage. The ripe tomatoes are on the bottom of the vines, and it's hard to find them without damaging some of the upper vine growth.
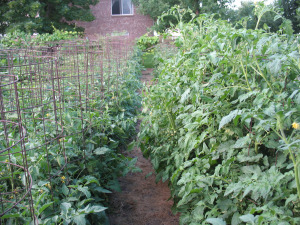
- Wire Cage: Plant the tomato seedlings every 20 inches along the row. Then place a circular heavy-duty wire cage (19-20 inches in diameter and 5 feet high) over the plants. This cage is made from a roll of 6” x 6” reinforced concrete wire. The plants then grow up through the cage. As the tomatoes develop and ripen, you can easily pick them without damaging the growing plant and unripe tomatoes. This is the system I use when planting tomatoes.
The growing tomatoes need to be kept damp to produce big tomatoes. After the tomatoes have developed and you begin to pick them, you can cut back on the watering.
This will encourage them to turn red more quickly. I usually water them with a
drip system
every 3-4 days during the hot growing season. The frequency of watering will depend on the weather condition in your area. See
Garden Watering Systems.
Back to Top
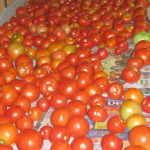
When the tomatoes begin to ripen, pick them every week. Pick all those that are beginning to turn red even the greenish ones. Place them on the flat table or shelf in a single layer. When they turn red, they’re ready to eat or can.
See
Preserving Tomatoes
to learn what to do in the fall with all those green tomatoes before they freeze.
Keep picking your tomatoes throughout the summer until the first frost. Note: when you are picking the tomatoes be sure you remove the little stem on the tomato. This way the stem from one tomato does not puncture a hole in the adjacent tomato when you place them in a bucket or basket. Having holes in your tomatoes will encourage spoilage before they ripen.
The varieties you choose will depend on your individual preference. Usually one or two cherry or grape tomatoes is sufficient. I personally enjoy the celebrity or supersonic tomatoes. They rank high in disease resistance and produce an abundant crop. The Roma tomatoes are great if you're canning a lot of spaghetti sauce or salsa. They don't take so long to cook down because they're not so juicy.
You’ll enjoy growing this wonderful vegetable or fruit (scientifically speaking it is a fruit, but as far as cooking is concerned, it’s a vegetable).
Back to Top
Return To:
Canning Tomatoes from Growing Tomatoes
Canning Spaghetti Sauce
Preserving Green Tomatoes
Gardening Vegetables
Types of Soil
Garden Watering Systems
Garden Weeds
Like this page? Share it. Here's how...
Would you prefer to share this page with others by linking to it?
- Click on the HTML link code below.
- Copy and paste it, adding a note of your own, into your blog, a Web page, forums, a blog comment,
your Facebook account, or anywhere that someone would find this page valuable.


