|
Assembling a Drip System
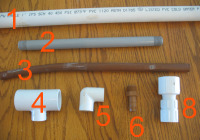
Materials:Quantities depend upon your system and size of garden

Step-By-Step Assembly Instructions Drip Line Pipes/HosesThe drip system uses a flexible pipe that has little holes in it. The pipe runs right next to the plant’s stem. The water flows out of the holes and waters the plants. Each hole has an emitter that controls the flow of the water. 
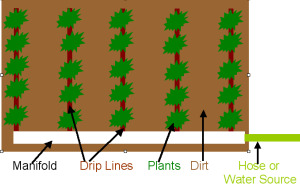
You can purchase the pipe with the emitters already installed by the manufacturer, or you can manually put emitters into your own pipe. These flexible hoses are connected to a manifold that feeds several hoses at the same time. Building the Manifold
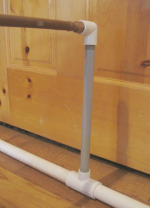
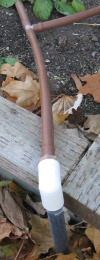
Use a one-inch plastic pipe for the main manifold. You can have a shut off valve that is manually controlled or automatically controlled. Note: If you want to be able to turn off an individual riser, you’ll need to put an inline control valve in that riser. The control valve can be placed anywhere in the pipe or hose. It will control the water flow from that point forward. When installing a drip system, the main manifold feed pipe can be buried in the ground. To do this connect a ½” male threaded riser pipe to the 1” slip x 1” slip x ½” female thread - PVC Tee. This makes the water accessible at ground level. The picture shows the connection of the riser pipe to the emitter drip line. You don’t have to bury the pipe. You can lay the manifold on the ground. If this is the case, you’ll need to remove the main manifold feed line each season so you can rototill the ground and keep the pipes from freezing. In either case the flexible drip pipes should be connected in the spring and removed each fall. How many lines should come off one manifold? That will depend upon the pressure and volume of your water source. Just 2 valves will control my entire garden 100’ X 50’. Step-By-Step Assembly Instructions
Back to Top Return to:Garden Watering Systems from Assembling a Drip System |
Drip System Supplies


 Space your risers (rows) about three-feet apart. Each one of these risers connects to the manifold. Note: you can use a splitter to run two drip lines off the same riser – See Picture.