|
Assemble and Clean Water FilterDetailed Instructions
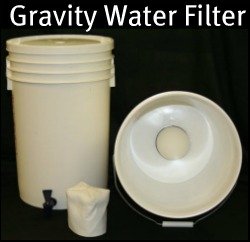
Two same-size buckets are needed. Wastebaskets to #10 cans may be used as long as the containers are suitable for potable water. Spigot Installations:1) Drill a ½” hole in the bottom of the top bucket and in the middle of the lid of the bottom bucket. If you buy a lid that is pre-drilled, line up the hole in the bottom of the top bucket with the hole in the lid of the bottom bucket. The bucket is drilled with the lid. There will only be one way that they will fit together. 2) Drill a ¾” hole for the spigot along the bottom rim of the bottom bucket. 3) Remove the spigot from the packaging. 4) Insert the spigot into the ¾” hole from the outside, using one washer. 5) In the interior of the bucket, screw on the wing nut. Hand tighten. 6) Turn the spigot by hand, clockwise, one full rotation (hand tighten only). 7) Fill the bucket with water and check for leaks. If leaking occurs, repeat steps 5 and 6. Filter Installation:
9) Put washer on stem of filter. Note: Be careful not to apply pressure or ‘torque’ on the water tube. To do so can cause the ceramic dome to crack around the base. 10) Insert the filter stem through the filter hole with the filter upright in the bucket. This should be tight. Hold onto the plastic base and gently screw the filter into place. 11) Tighten the wing nut on the filter stem. If leaking occurs, repeat step 11. Put the felt water sock onto the ceramic dome and hold it in place with a rubber band. This will help to keep the dirt away from the filter, thus prolonging the life of the filter. The sock can be removed for cleaning. 12)Pour the dirty water in the top bucket and dispense the clean water out of the bottom bucket. Filling Instructions:
Cleaning Instructions:
The need to clean the water filter goes down when you pre-filter the water first. That is why we recommend the giant water sock. (link coming soon) Flow Rate:
The flow rate might also be slow because the filter is dirty. If this is the case, clean water filter and fill the top bucket. Storage:
The ceramic absorbs the moisture from the air. When the water vapor in the filter freezes, it cracks the filter. One solution is to always store it indoors. Another option is to ‘can it’ in a #10 canner or Mylar bag with some oxygen absorbers. An airtight container will keep the ceramic filter from absorbing moisture from the air. You can store the pieces of your water kit in the nested buckets. Important!
The ceramic wall on a new filter is 3/8" thick. Each time you clean water filter, the ceramic wall gets thinner. (The filter can be cleaned about 100 times) Replacement of the filter will depend on the filthiness of the water. The cleaner your contaminated water, the less often you will have to scrub your filter. Once you start using the filter, the activated carbon in the filter is only good for about 6 months. The activated carbon inside will pack over time. The filter needs to be shaken to unpack the carbon. Current figures say the unused carbon should have a shelf life between at least 2 or 3 years, if not much more. There is a difference between the life of the ceramic part of the filter (8-12 months) and life of the activated carbon (6 months). So what do you do? The ceramic part of the filter will continue to work in filtering out bacteria, but your water might not taste as good. Here's a solution. Buy some activated charcoal in the fish section of the pet store. After the six months of using your filter are over and you notice that your water does not taste as good as you would like, add the new activated charcoal to the top bucket of the filter. (We'll talk about how to make your own charcoal on the "make your own filter page" - link coming) The small sock has an indefinite shelf life. Return To:
Methods of Water Purification Buy an Emergency Water FilterProvident Living Today from Assemble & Clean Water Filter |


